Usage Overview
Video Demo
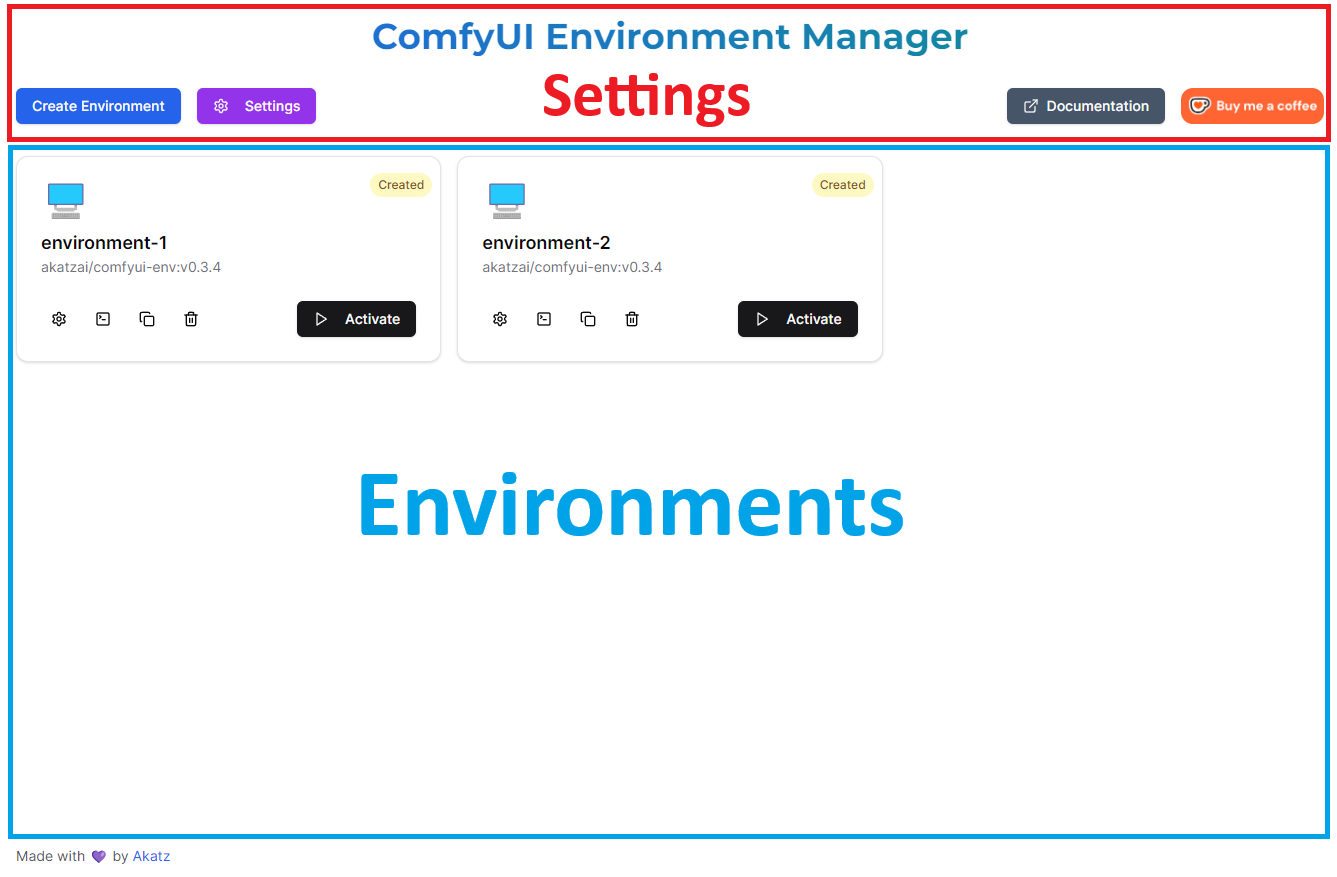
Manager Layout
ComfyDock has two main sections:
- Settings Panel (top)
- Environments Grid (below)
Updating User Settings
- Open Settings tab.
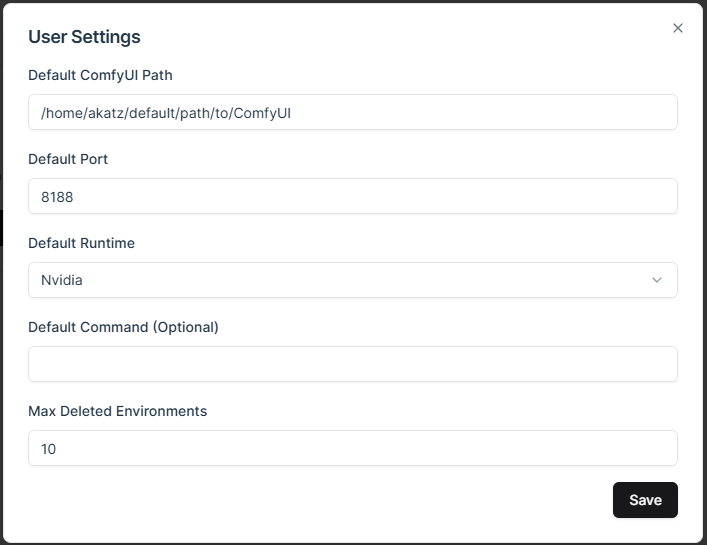
- Configure Defaults:
- ComfyUI Path
- Port
- Runtime
- Start command
- Click Save.
Creating a New Environment
Demo Video
- Click Create Environment.
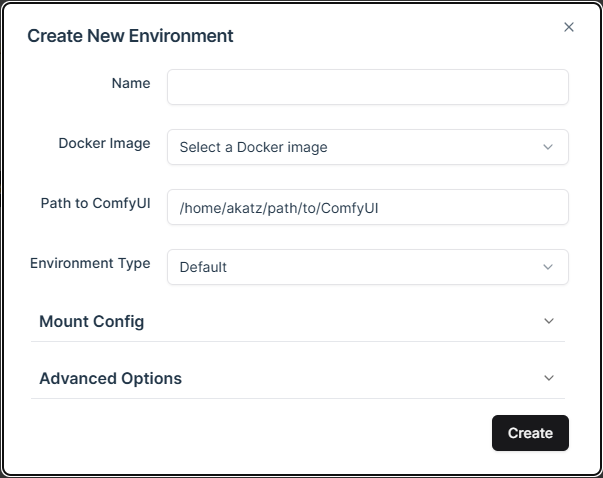
- Fill out fields:
- Name: Any text (emojis allowed).
- Docker Image: Pick a ComfyUI base image from Docker Hub, an image installed locally, or a custom image url using the dialog.
- See the Docker Images section below for more details.
- Path to ComfyUI: A valid directory on your host machine.
- This can be any valid path to a directory on your host machine that you have write and read permissions to:
- e.g. “C:\Users\akatz\my\path\to\ComfyUI”
- If you don’t have ComfyUI already installed at the provided location, you will be prompted to install it after hitting “create”
- If you provide a path to a directory containing multiple “ComfyUI” folders, the code will select the first directory to use with the environment.
- Select an Environment Type (Default, etc.).
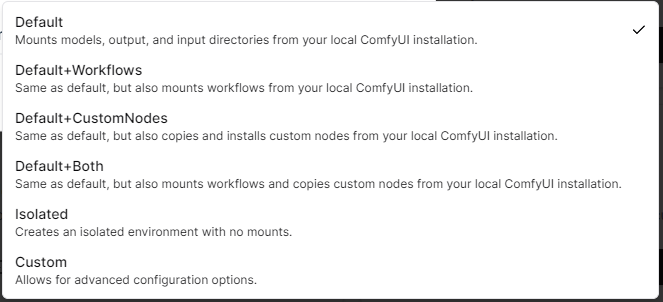
- If default is selected, the environment will attempt to “mount” the models, output, and input directories from your existing ComfyUI installation into the environment.
- Mounted directories can be read and written to by the environment, anything not mounted from the host machine will not be accessible by the environment.
- You can see how changing the Environment Type directly affects the Mount Config by expanding the Advanced Settings tab.
- Click Create.
Note: If you have not yet downloaded the selected ComfyUI release image, then you will be prompted to download it on create.
Docker Images
Browsing Docker Hub Images
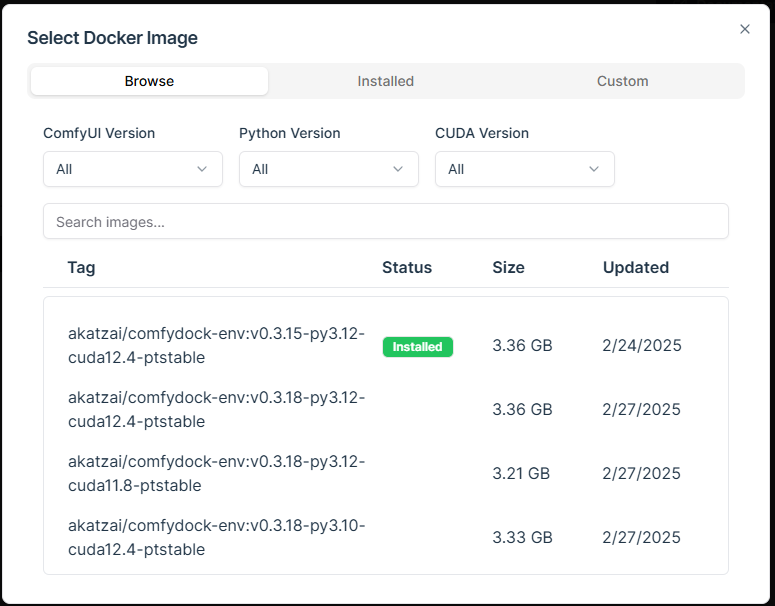
When you first open the Docker Image dialog, you will be presented with a list of image tags available on Docker Hub. These images are custom ComfyUI base images that I have created for this tool. You can see the dockerfile and workflow used to build these images here. See the list of available images on dockerhub. The tag format is as follows:
<comfyui-release>-py<python-version>-cu<cuda-version>-pt<pytorch-version>
You can choose options in the separate dropdowns to filter the images by ComfyUI release, Python version, and CUDA version. You can also search for a specific image by name. Images that you have already downloaded will be shown in the list with a green "Installed" badge.
Note: If you have not yet downloaded the selected image, then you will be prompted to download it on create.
Using Local Images
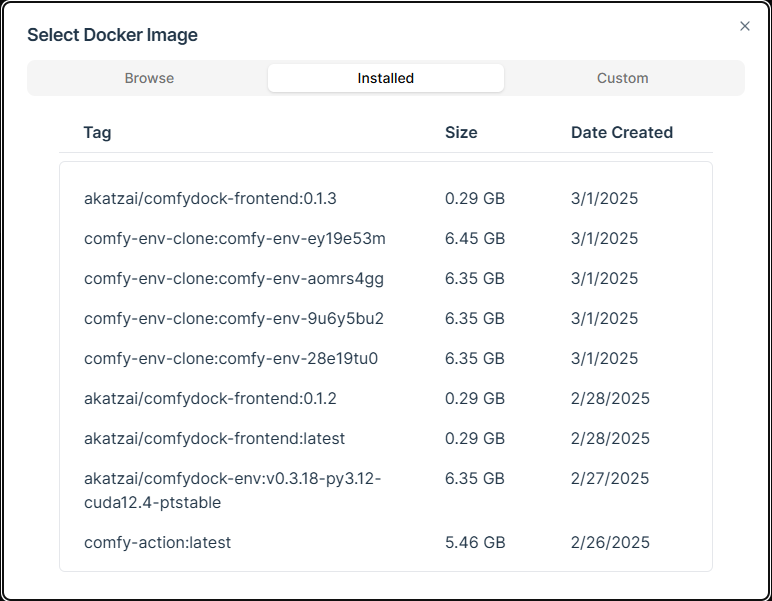
If you have a local image already downloaded, you can select it by tag in the “Installed” tab. This list will show all images you currently have available on your machine.
Using Custom Images
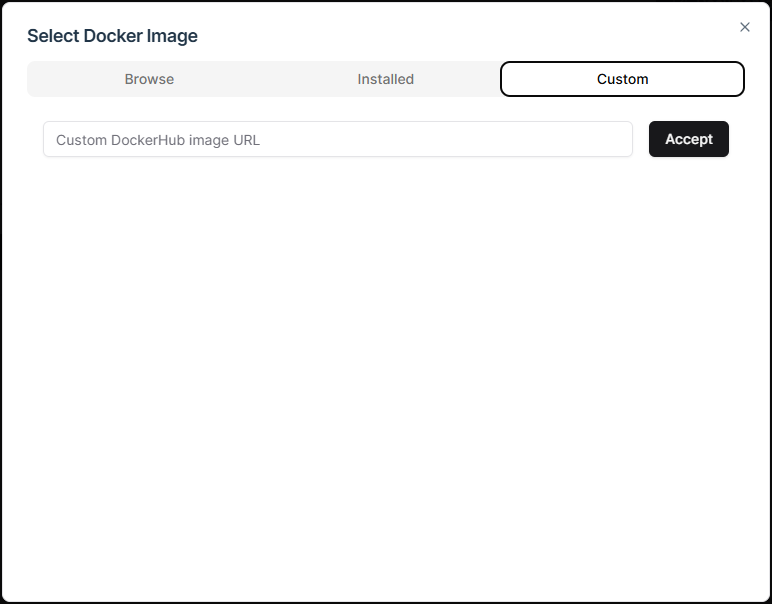
If you have a custom image you want to use, you can specify it by tag in the “Custom" tab. This input expects a full Docker Hub image tag string:
e.g. akatzai/comfydock-env:v2.6.0-py3.12-cu12.1-ptstable.
Note: Currently only custom images from Docker Hub are supported.
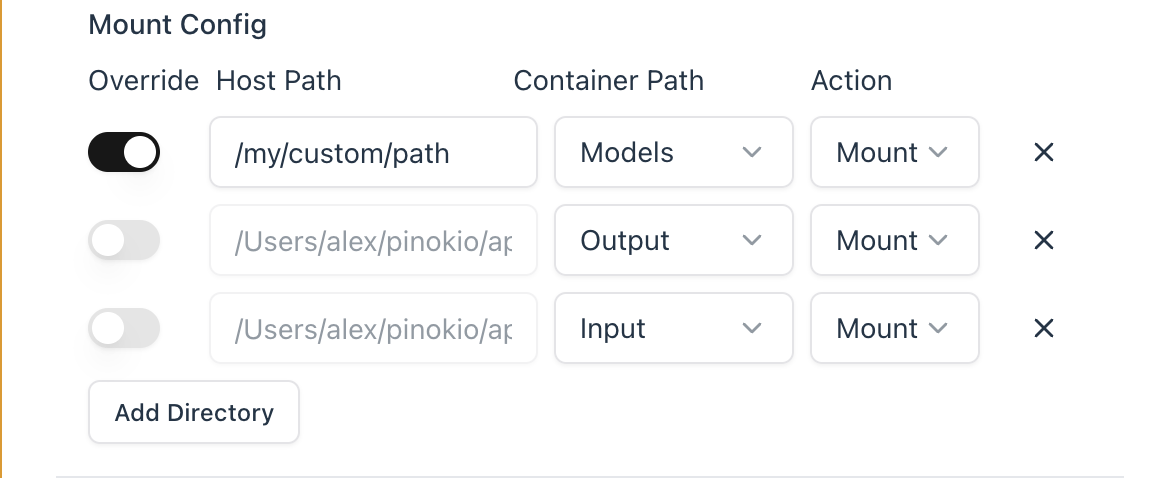
Mount Config
The Mount Config panel now provides granular control over how host directories interact with container paths, with four configurable columns per row:
Columns Explained
- Override (Checkbox):
- Checked: Manually specify the exact host path. Useful for non-standard directory locations.
- Unchecked: Automatically generates host path by combining your ComfyUI path with the selected container directory name (e.g., if ComfyUI path is
C:\ComfyUIand container path ismodels, host path becomesC:\ComfyUI\models).
- Host Path:
- The physical directory on your machine that will be connected to the container.
- Editable directly when Override is checked.
- Grayed out and auto-generated when Override is unchecked.
- Container Path (Dropdown):
- Predefined container locations you can map to:
/app/ComfyUI/models/app/ComfyUI/output/app/ComfyUI/input/app/ComfyUI/custom_nodes/app/ComfyUI/user
- Predefined container locations you can map to:
- Mount Action:
- Mount: Creates live sync between host and container directories (changes reflect immediately in both)
- Copy: Creates a one-time snapshot copy from host to container at environment creation
Key Behaviors
- Changing any Mount Config setting automatically switches Environment Type to "Custom"
- Add new mappings with Add Directory button
- Delete mappings using the ❌ icon on each row
- Container paths must be absolute paths starting with
/ - Host paths follow OS conventions (Windows:
C:\path, Linux/macOS:/path)
Mounting vs. Copying (Updated)
When to Use Mount:
- Frequently updated resources (models, input/output folders)
- Shared assets between environments
- Development/testing scenarios needing real-time changes
When to Use Copy:
- Creating immutable snapshots for reproducibility
- Archiving specific workflow versions
- Sharing environments with bundled dependencies
- Sensitive data that shouldn't persist in host directories
Important Notes:
- Copied directories become container-only - changes in host won't affect them
- Mounted custom_nodes directories trigger automatic dependency installation
- Read-only mounts (available via advanced settings) prevent accidental container modifications
Advanced Options
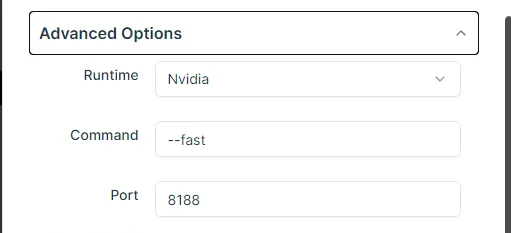
- Runtime:
NVIDIAfor GPU orNonefor CPU. - Command: Extra flags for the ComfyUI startup command, e.g.
--fastor--lowvram. - Port: The web UI port.